Step-by-Step Guide: Setting Up Nicky for Your Business
Cryptocurrency payments are transforming the way businesses handle transactions, offering faster, more secure, and borderless payment options. If you’re looking to integrate crypto payments into your business, Nicky provides a seamless and efficient platform to get started. In this guide, we’ll walk you through the step-by-step process of setting up Nicky for your business.
Step 1: Sign Up for a Nicky Account
To start accepting crypto payments, the first step is to create an account on the Nicky platform.
- Visit the Nicky website.
- Click on the Sign Up button.
- Enter your business details, including your email address and password.
- Verify your email address to activate your account.
Step 2: Connect Your Crypto Wallets
Nicky is a non-custodial platform, meaning payments go directly to your own wallets. To connect your wallets:
- Log in to your Nicky account.
- Navigate to the Wallet Settings section.
- Choose your preferred wallet(s) and enter the necessary details.
- Save the settings to enable payment reception.
Step 3: Define Your Payment Routes
Payment routing allows you to customize how funds are managed when received.
- Go to Payment Routes in your dashboard.
- Set specific rules for directing payments to different wallets.
- If required, enable automated conversion to fiat currency.
- Configure withdrawal options to a linked bank account.
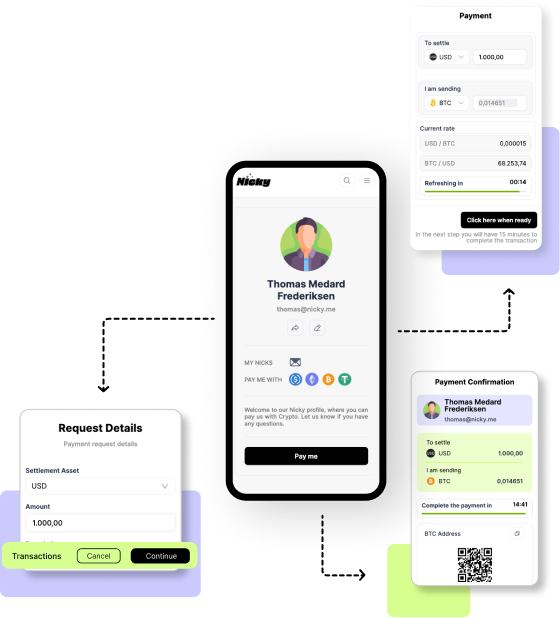
Step 4: Generate Payment Requests
Nicky allows businesses to create and send payment requests easily.
- Click on Create Payment Request in your dashboard.
- Enter the payment amount and select the currency.
- Generate a payment link or QR code for your customer.
- Share the payment request via email, social media, or directly on your website.
Step 5: Integrate Nicky with Your Online Store
For eCommerce businesses, integrating Nicky ensures a seamless checkout experience.
- Navigate to the Developers section to access API documentation.
- Use the provided API keys to integrate Nicky with your website or app.
- For platforms like WHMCS, install the official Nicky plugin.
- Test the integration by making a small test transaction.
Step 6: Monitor Transactions and Withdraw Funds
Stay on top of your transactions through Nicky’s dashboard.
- Access the Transaction History tab.
- View received payments, pending transactions, and completed withdrawals.
- Set up automated withdrawals to your bank account for easy fund management.
Step 7: Offer Customer Support and Build Trust
Ensure a smooth experience for your customers by offering support.
- Include an FAQ section on your website regarding crypto payments.
- Use Nicky’s reporting tools to track disputes or chargebacks.
- Provide clear instructions for customers unfamiliar with cryptocurrency payments.
Conclusion
Setting up Nicky for your business is a straightforward process that unlocks the power of cryptocurrency payments. By following these steps, you can efficiently accept crypto payments, automate transactions, and enhance your business’s payment flexibility. Whether you’re a freelancer, small business, or large enterprise, Nicky offers the tools to streamline your crypto payment processing.
Ready to start? Sign up on Nicky today and revolutionize the way your business handles payments!