Want to start accepting payments on your Store.icu eCommerce store today? Integrating Razorpay—India’s leading payment gateway—is the fastest way to enable UPI, cards, wallets, and 100+ payment methods. And the best part? It takes just 15 minutes from start to finish.
⏱️ Time Required: 15 minutes | 💡 Skill Level: Beginner | 💰 Cost: ₹0 setup fee
Why Integrate Razorpay with Store.icu?
Before diving into the how-to, let’s understand why this integration is perfect for Indian eCommerce:
- Accept All Payment Methods: UPI (PhonePe, Google Pay, Paytm), cards, netbanking, wallets, EMI, Pay Later
- Zero Setup Cost: No upfront fees—start accepting payments immediately
- Native Integration: Built directly into Store.icu dashboard
- Fast Settlements: Money in your bank within 2-3 days
- 98%+ Success Rate: Industry-leading payment success
- Mobile-First: Optimized for Indian smartphone users
- Instant Activation: Most accounts approved within 24 hours
What You’ll Need Before Starting
✓ Prerequisites Checklist:
- ✅ Active Store.icu account with admin access
- ✅ PAN Card (Personal or Business)
- ✅ Business registration documents (if applicable)
- ✅ Bank account in your name/business name
- ✅ Cancelled cheque or bank statement
- ✅ Address proof (Aadhaar, utility bill, etc.)
- ✅ Active mobile number and email
- ✅ 15 minutes of focused time
💡 Pro Tip: Have all your documents scanned and ready before starting. This speeds up the KYC process significantly.
Step 1: Create Your Razorpay Account (5 minutes)
First, you need a Razorpay merchant account to receive payments.
1.1 Sign Up for Razorpay
- Visit dashboard.razorpay.com/signup
- Enter your email address and create a strong password
- Click “Create Free Account”
- Verify your email by clicking the link sent to your inbox
1.2 Complete Business Profile
- Log into your Razorpay dashboard
- Click on “Activate your Account” or navigate to Settings → Account
- Fill in your business details:
- Business Type: Sole Proprietorship, Partnership, Private Limited, etc.
- Business Name: Your store name
- Business Category: Select your industry (e.g., Fashion, Electronics)
- Business Description: Brief description of what you sell
- Website URL: Your Store.icu store URL
1.3 Complete KYC Verification
- Navigate to Settings → Account → KYC Details
- Upload required documents:
- PAN Card: Individual PAN or Business PAN
- Business Proof: GST Certificate, Shop Establishment, or COI (if registered)
- Bank Account: Add your bank account details
- Bank Proof: Upload cancelled cheque or bank statement
- Address Proof: Aadhaar, passport, or utility bill
- Click “Submit for Verification”
- Wait for approval (typically 24-48 hours, but can be instant)
⏰ Approval Timeline: While waiting for approval, you can continue with the integration steps below. Test mode will work immediately even before approval.
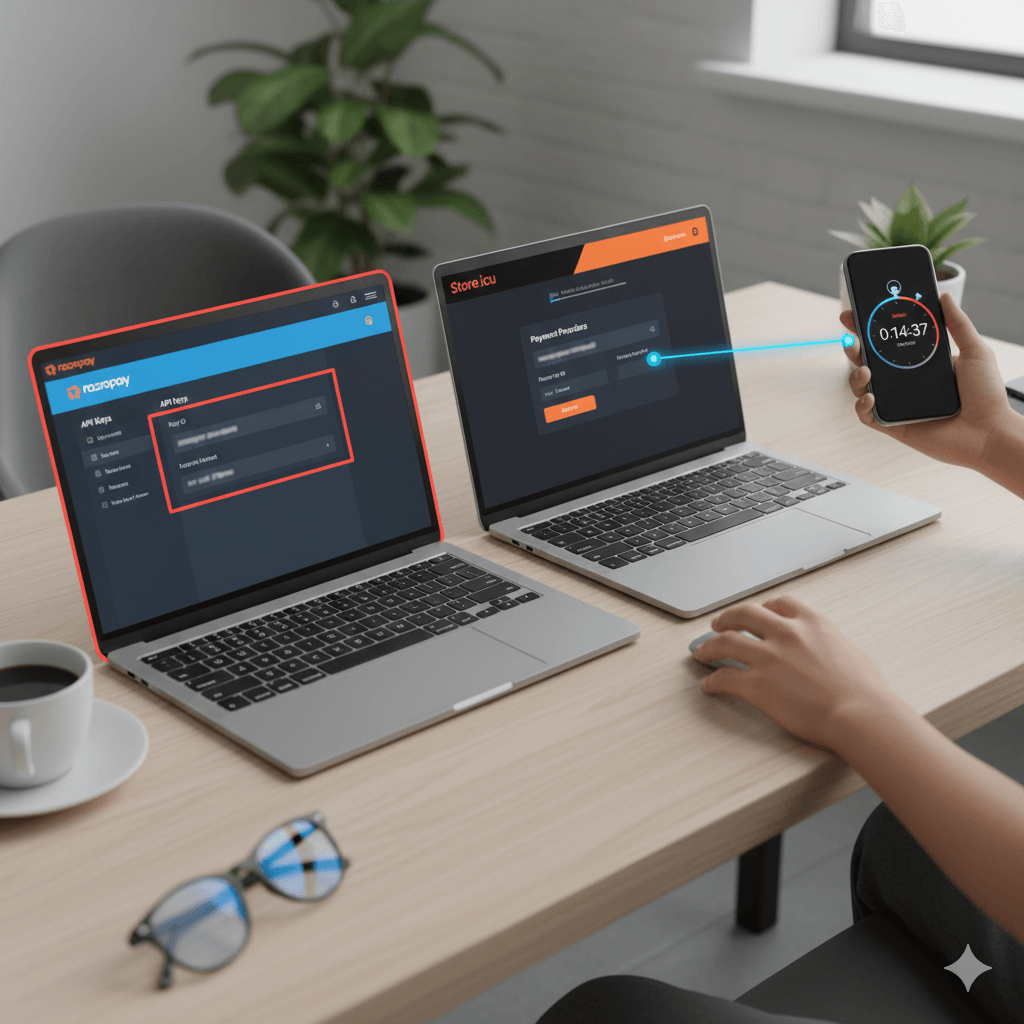
Step 2: Get Your Razorpay API Keys (2 minutes)
API keys are what connect your Store.icu store to your Razorpay account.
2.1 Access API Keys
- Log into your Razorpay dashboard
- Click on Settings in the left sidebar
- Navigate to API Keys (under Website and app settings)
- You’ll see two keys:
- Test Mode: For testing payments (no real money)
- Live Mode: For accepting real payments (appears after KYC approval)
2.2 Generate Keys
- Start with Test Mode keys for initial setup
- Click “Generate Test Key” if not already generated
- You’ll see two values:
- Key ID: Starts with
rzp_test_ - Key Secret: Click “Show” to reveal (starts with letters/numbers)
- Key ID: Starts with
- Copy both keys—you’ll need them in the next step
🔒 Security Warning: Never share your Key Secret publicly or include it in client-side code. Treat it like a password. Anyone with your secret key can access your Razorpay account.
Step 3: Configure Razorpay in Store.icu (5 minutes)
Now let’s connect everything together in your Store.icu dashboard.
3.1 Access Payment Settings
- Log into your Store.icu admin dashboard
- Navigate to Settings → Payments in the left sidebar
- You’ll see a list of available payment methods
- Click “Add Payment Method”
3.2 Select Razorpay
- From the list of available payment providers, find and select “Razorpay”
- You’ll be taken to the Razorpay configuration page
3.3 Enter API Credentials
- In the configuration form, enter:
- Key ID: Paste your Razorpay Key ID (from Step 2)
- Key Secret: Paste your Razorpay Key Secret
- Display Name: “Pay with Razorpay” or customize as needed
- For now, use your Test Mode keys to test everything
3.4 Configure Payment Options
- Choose which payment methods to enable:
- ✅ Credit/Debit Cards: Visa, Mastercard, RuPay, Amex
- ✅ UPI: PhonePe, Google Pay, Paytm, BHIM
- ✅ Netbanking: All major banks
- ✅ Wallets: Paytm, Mobikwik, FreeCharge, Amazon Pay
- ✅ EMI: Card EMI and Cardless EMI
- ✅ Pay Later: LazyPay, Simpl, ZestMoney
- Set minimum order amount (if desired)
- Configure payment capture mode:
- Automatic: Capture payment immediately (recommended)
- Manual: Capture payment later (for pre-orders, etc.)
3.5 Enable the Payment Method
- Toggle the “Enable Payment Method” switch to ON
- Click “Save” or “Submit”
- You should see a success message
✅ Congratulations! Razorpay is now connected to your Store.icu store. Let’s test it!
Step 4: Test Your Integration (3 minutes)
Always test before going live to ensure everything works perfectly.
4.1 Create a Test Product
- In your Store.icu dashboard, go to Products → Add Product
- Create a simple test product:
- Name: “Test Product”
- Price: ₹100
- Status: Active
- Save the product
4.2 Place a Test Order
- Open your Store.icu store in a new browser window (or incognito mode)
- Add the test product to cart
- Proceed to checkout
- Fill in customer details (use a valid email you can access)
- Select Razorpay as payment method
- Click “Place Order”
4.3 Complete Test Payment
- You’ll be redirected to Razorpay’s payment page
- Since you’re in test mode, you’ll see test payment options
- Use Razorpay’s test credentials:
- Test Card: 4111 1111 1111 1111
- CVV: Any 3 digits (e.g., 123)
- Expiry: Any future date (e.g., 12/25)
- Name: Any name
- Click “Pay”
- You should see a success message and be redirected back to your store
4.4 Verify in Dashboards
- Check your Store.icu Orders page—order status should be “Paid”
- Check your Razorpay Dashboard—payment should appear under Transactions
- Verify you received an order confirmation email
💡 Test Multiple Methods: Test with different payment methods (UPI, netbanking, wallets) to ensure everything works. Razorpay provides test credentials for each method.
Step 5: Go Live with Real Payments (2 minutes)
Once your KYC is approved and testing is successful, switch to live mode.
5.1 Wait for KYC Approval
- Check your email for Razorpay approval notification
- Or check dashboard—you’ll see “Account Activated” status
- Live API keys will now be available
5.2 Generate Live API Keys
- In Razorpay dashboard, go to Settings → API Keys
- Switch to “Live Mode” (toggle at top of page)
- Click “Generate Live Key”
- Copy both Key ID and Key Secret (Key ID starts with
rzp_live_)
5.3 Update Store.icu with Live Keys
- Go back to your Store.icu dashboard
- Navigate to Settings → Payments → Razorpay
- Replace test keys with live keys:
- Update Key ID with live key
- Update Key Secret with live secret
- Click “Save”
5.4 Place a Small Real Order
- Make a small real payment (₹10-50) to verify live mode works
- Use your own card or UPI
- Verify payment appears in both dashboards
- Check that money settles to your bank account (T+2 days)
🎉 You’re Live! Your Store.icu store is now accepting real payments through Razorpay. Start selling!
Advanced Configuration Options
Once basic integration is working, explore these advanced features:
Payment Customization
- Custom Branding: Add your logo to Razorpay checkout page
- Payment Description: Customize the payment description customers see
- Preferred Methods: Show certain payment methods first
- Language Selection: Offer checkout in regional languages
Webhooks Setup
- In Razorpay dashboard, go to Settings → Webhooks
- Click “Add Webhook”
- Enter your Store.icu webhook URL (available in Store.icu Razorpay settings)
- Select events to track:
- payment.authorized
- payment.captured
- payment.failed
- refund.created
- Save webhook—now you’ll get real-time payment updates
Refund Settings
- Configure automatic refund rules in Store.icu
- Set refund processing time (instant vs. manual review)
- Enable partial refunds if needed
Fraud Prevention
- In Razorpay dashboard, navigate to Settings → Payments → Risk Controls
- Configure:
- Velocity Limits: Maximum transactions per IP/card
- Geoblocking: Block specific countries if not serving them
- Amount Limits: Set maximum transaction amounts
- Email/Phone Verification: Require verified contact details
Troubleshooting Common Issues
Issue 1: “Invalid API Key” Error
Causes:
- Copied key incorrectly (extra spaces, missing characters)
- Using test key in live mode or vice versa
- API key was regenerated in Razorpay but not updated in Store.icu
Solutions:
- Re-copy the API key carefully (no extra spaces)
- Verify you’re using the correct mode (test vs. live)
- Check if the key is still active in Razorpay dashboard
- Regenerate the key if necessary and update in Store.icu
Issue 2: Payment Page Not Loading
Causes:
- JavaScript blocked by browser
- Ad blocker interfering
- Network connectivity issues
- Razorpay servers temporarily down
Solutions:
- Try in incognito/private browsing mode
- Disable ad blockers temporarily
- Check Razorpay status page for outages
- Clear browser cache and cookies
- Try a different browser
Issue 3: Payments Successful but Order Not Created
Causes:
- Webhook not configured properly
- Store.icu and Razorpay not syncing
- Network timeout during redirect
Solutions:
- Set up webhooks (see Advanced Configuration above)
- Check webhook logs in Razorpay dashboard
- Verify webhook URL is correct in Razorpay
- Contact Store.icu support to verify integration
Issue 4: KYC Stuck in “Under Review”
Causes:
- Missing or unclear documents
- Mismatch in business name/details
- Additional verification required
Solutions:
- Check email for requests from Razorpay
- Ensure all documents are clear and valid
- Verify business name matches across all documents
- Contact Razorpay support via dashboard chat
Issue 5: Settlement Delayed or Not Received
Causes:
- Bank account details incorrect
- Settlement schedule not yet due (T+2 days)
- KYC incomplete or additional verification needed
- Bank holiday affecting settlement
Solutions:
- Verify bank account details in Razorpay dashboard
- Check settlement schedule (Settings → Settlements)
- Ensure KYC is fully approved
- Account for weekends and bank holidays
- Contact Razorpay support if delayed beyond T+5
Optimizing Payment Success Rates
Follow these best practices to maximize successful payments:
1. Enable All Payment Methods
Don’t restrict payment options. The more choices customers have, the higher your conversion rate. Some customers prefer UPI, others cards, others wallets.
2. Use Mobile-Optimized Checkout
Razorpay’s checkout is mobile-first, but ensure your Store.icu theme is also mobile-responsive. 70%+ of Indian eCommerce traffic is mobile.
3. Clear Pricing
Show all costs upfront (product price, shipping, taxes). Surprise costs at checkout are the #1 reason for cart abandonment.
4. Save Card Details
Enable Razorpay’s card saving feature for repeat customers. This reduces friction and increases repeat purchase rates.
5. Retry Failed Payments
Enable automatic retry for failed payments. Sometimes payments fail due to temporary issues—automatic retry can recover 15-20% of failed transactions.
6. Offer EMI Options
For products over ₹3,000, offer EMI. This can increase conversion rates by 25-30% for higher-value items.
7. Use Smart Routing
Enable Razorpay’s smart routing feature. It automatically selects the best payment path based on success rates, increasing overall payment success.
Understanding Transaction Fees
Razorpay’s pricing is transparent and competitive:
| Payment Method | Fee | Example (₹1,000 order) |
|---|---|---|
| Domestic Cards | 2% + GST | ₹23.60 |
| UPI | 2% + GST | ₹23.60 |
| Netbanking | 2% + GST | ₹23.60 |
| Wallets | 2% + GST | ₹23.60 |
| International Cards | 3% + GST | ₹35.40 |
What’s NOT Charged:
- Setup fee: ₹0
- Annual maintenance: ₹0
- Dashboard access: ₹0
- API usage: ₹0
- Standard settlements: ₹0
Next Steps After Integration
Now that Razorpay is set up, maximize its potential:
Week 1: Monitor and Optimize
- Track payment success rates in Razorpay dashboard
- Identify which payment methods customers prefer
- Monitor settlement timings
- Set up email notifications for transactions
Week 2: Enhance Customer Experience
- Customize checkout page with your branding
- Enable saved card feature for returning customers
- Add payment method icons to your Store.icu theme
- Create trust badges highlighting secure payments
Week 3: Add Advanced Features
- Set up Razorpay Payment Links for WhatsApp sales
- Create subscription products if selling recurring items
- Explore Razorpay invoicing for B2B sales
- Set up automatic refund workflows
Week 4: Scale and Grow
- Analyze payment data to understand customer behavior
- Optimize pricing strategy based on EMI usage
- Expand to international markets if relevant
- Consider Razorpay Capital for business loans
Getting Help and Support
Store.icu Support
- Documentation: onlinestore.support/docs
- Support Portal: Submit tickets through your dashboard
- Live Chat: Available during business hours
- Email: support@store.icu
Razorpay Support
- Help Center: razorpay.com/support
- Dashboard Chat: Click chat icon in Razorpay dashboard
- Email: support@razorpay.com
- Phone: 080-68274444 (Mon-Sat, 9 AM – 9 PM)
Frequently Asked Questions
How long does Razorpay approval take?
Most accounts are approved within 24-48 hours. Some may take up to 5-7 days if additional documentation is needed. You can test the integration immediately in test mode while waiting for approval.
Can I use Razorpay without GST registration?
Yes! You can use Razorpay as a sole proprietor without GST registration. You’ll still need PAN and basic business documentation.
What’s the minimum order amount for Razorpay?
Razorpay supports payments from ₹1 onwards. There’s no minimum order amount, though you should consider that transaction fees make very small transactions less economical.
Can I accept international payments?
Yes! Once your account is approved, you can enable international card payments. This requires additional RBI compliance documentation, which Razorpay guides you through.
How do refunds work?
Refunds can be processed instantly from either your Store.icu dashboard or Razorpay dashboard. The money is returned to the customer’s source account within 5-7 business days (depending on the bank).
Is there a transaction limit?
By default, the transaction limit is ₹1 lakh per transaction. You can request higher limits by contacting Razorpay support with your business justification.
What happens if a payment fails?
Failed payments are automatically marked as failed in both dashboards. No money is deducted from the customer. They can retry immediately or return later to complete payment.
Conclusion: You’re Ready to Accept Payments!
Congratulations! You’ve successfully integrated Razorpay with your Store.icu eCommerce store. What used to take weeks of development work and thousands in setup fees is now complete—in just 15 minutes.
✅ What You’ve Accomplished:
- ✅ Created a Razorpay merchant account
- ✅ Connected Razorpay to your Store.icu store
- ✅ Tested the integration thoroughly
- ✅ Went live with real payments
- ✅ Learned optimization best practices
- ✅ Know how to troubleshoot common issues
Your store is now ready to accept payments from millions of Indian customers using their preferred payment methods. As you grow, Razorpay and Store.icu will scale effortlessly with you.
Ready to Launch Your Store?
Create a professional eCommerce store with Razorpay payments built-in.
Next Steps:
- 📚 Read: Razorpay vs Traditional Payment Gateways
- 🎓 Explore: 10 Razorpay Features for Store.icu
- 💬 Join our Community of Indian eCommerce entrepreneurs
- 📊 Store.icu University – Free courses